
To adjust a Hario coffee grinder, turn its grind setting one click at a time, test the coffee, and move finer or coarser based on taste and brew speed. Most Hario hand grinders use a ceramic burr and a numbered dial, nut, or ring. The exact setting depends on your Hario model, coffee beans, and brewing method.
A good adjustment does not come from choosing one “correct” number. It comes from finding the grind size that lets your coffee brew at the right speed and taste balanced.
This guide covers common Hario grinders sold in the United States, including the Skerton, Mini Mill, Slim, Smart G, and similar ceramic-burr models.
How Hario Grinder Adjustments Work
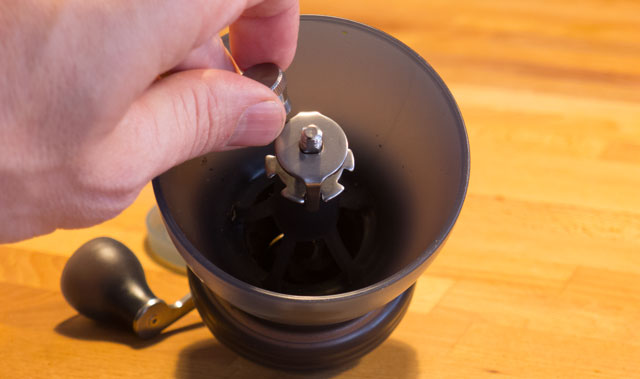
A Hario grinder changes grind size by moving one burr closer to or farther from the other burr. A small gap creates finer grounds. A larger gap creates coarser grounds.
The adjustment control may look different across Hario models:
- Adjustment nut: Common on older Skerton-style grinders.
- Adjustment ring: Found on some Skerton versions and similar models.
- Numbered dial: Used on models such as the Hario Mini Mill and Slim.
- Bottom dial: Found on some newer or upgraded Hario grinders.
- External click dial: Used on certain Smart G models.
The numbers are not universal across the Hario range. A setting of “5” on one grinder may not match “5” on another. Use the number as a repeatable reference for your grinder, not as a universal coffee standard.
Finer Versus coarser settings
- Finer grind: Smaller particles, slower water flow, and usually a stronger or more bitter extraction.
- Coarser grind: Larger particles, faster water flow, and usually a weaker or more sour extraction.
Some Hario controls turn clockwise for finer grinding, while others may work differently. Follow the arrows or labels on your grinder. If the grinder has no clear markings, make a small test adjustment and check whether the burr gap becomes smaller or larger.
Do not force the adjustment dial past its stop. Ceramic burrs can chip if they are pressed together while the grinder is loaded with beans.
Before You Adjust Your Hario Grinder
Start with an empty grinder when making a major adjustment. Loose beans can put pressure on the burrs and make the control hard to turn.
You will need:
- Your Hario grinder
- Fresh coffee beans
- A scale, if available
- Your normal brewing device
- A timer
- Water at your usual brewing temperature
- A clean cup for tasting
If you are making only a one-click change during grinding, some Hario models allow you to adjust the control while the burrs are turning. Turn the crank gently and never force the dial. If the control feels tight, stop, remove the beans, and clean the burr area before continuing.
Check the grinder first
Before changing the setting, inspect these parts:
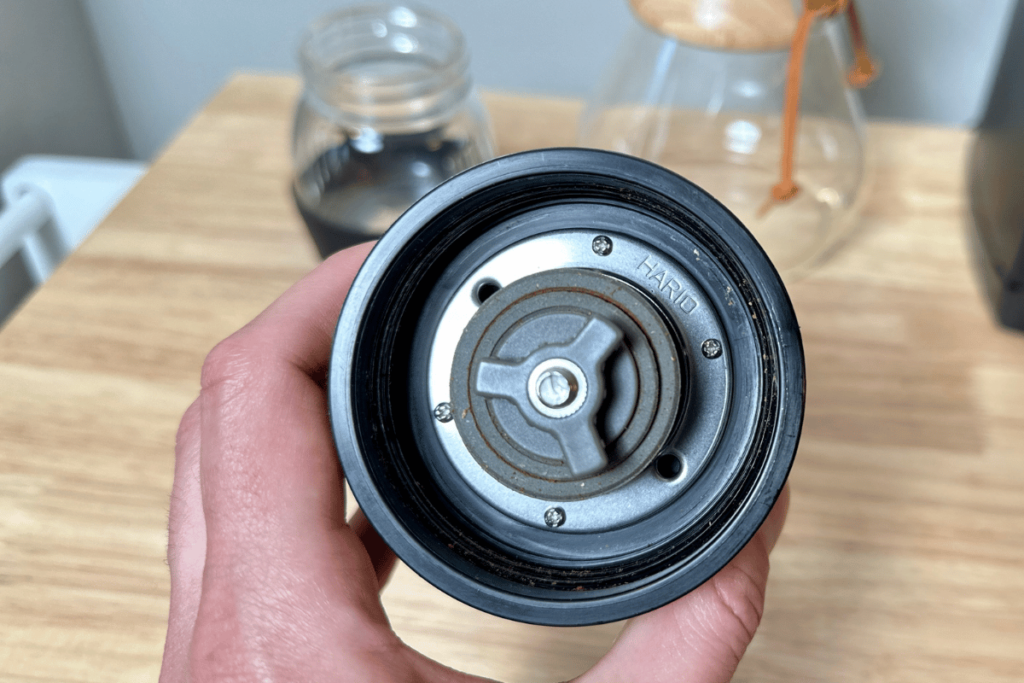
- The burrs: Look for trapped grounds, chaff, or small stones.
- The shaft: Make sure the crank turns smoothly.
- The hopper: Confirm that it is seated correctly.
- The adjustment spring or washer: Check that it is in the correct position if your model uses one.
- The catch cup: Make sure it is firmly attached.
A loose burr or missing spring can make the grind size change while you turn the handle. That can lead to uneven coffee and confusing results.
How to Adjust a Hario Coffee Grinder Step by Step
Use this process whenever you change beans, switch brewing methods, or want to correct the taste of your coffee.
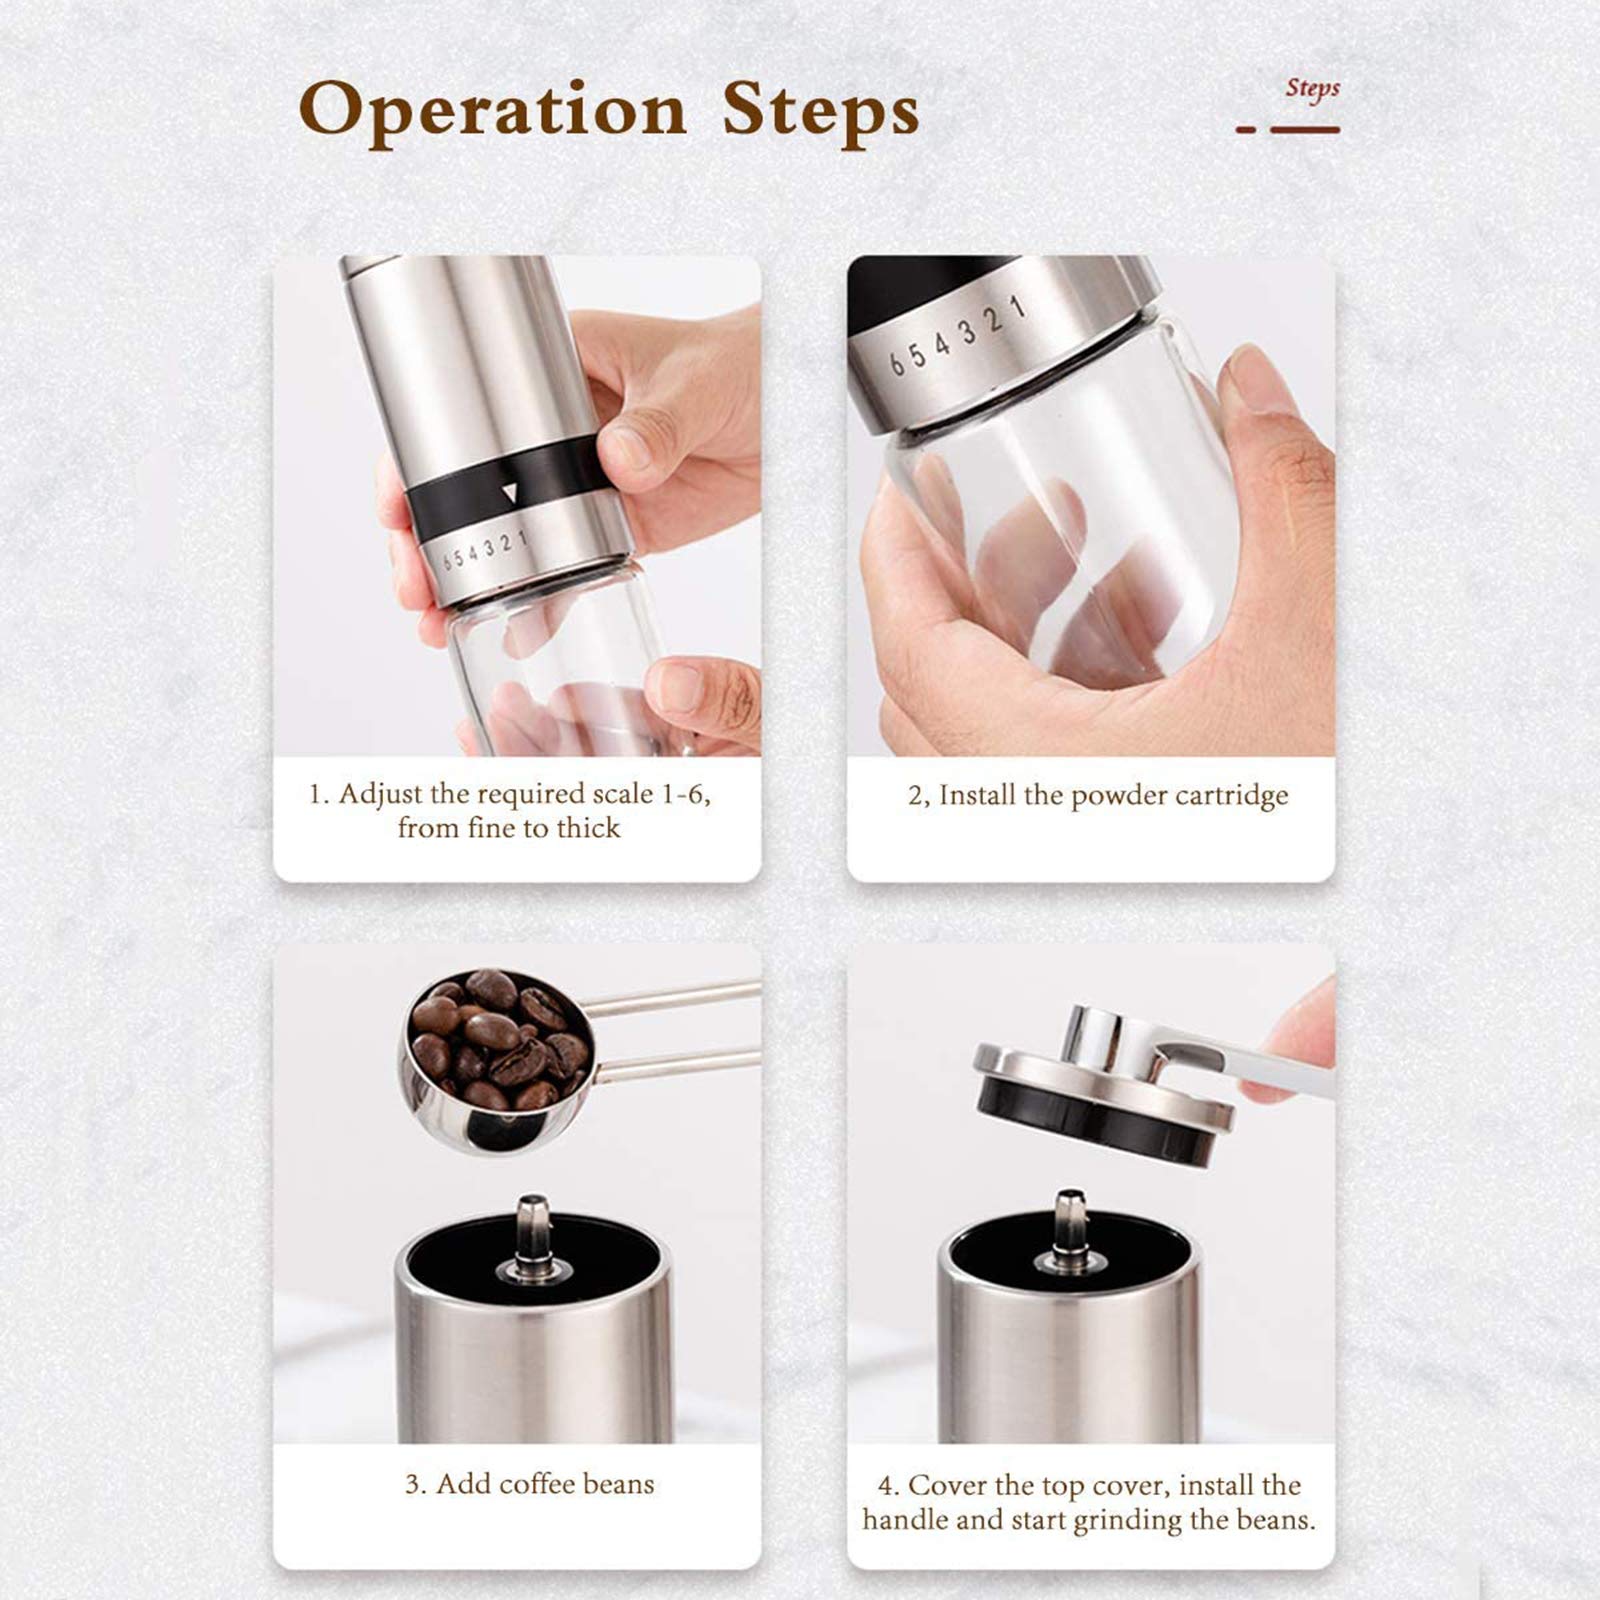
1. Identify the Hario grinder model
Find the model name on the grinder, box, or product manual. Common names include:
- Hario Skerton
- Hario Skerton Plus
- Hario Mini Mill
- Hario Mini Mill Slim
- Hario Ceramic Coffee Mill
- Hario Smart G
- Hario Smart G PRO
The adjustment method and click range can vary. If the model has a dial with numbers, write down the current number before changing it.
2. Set the grinder near the middle of its range
A middle setting gives you room to move finer or coarser. It also makes it easier to learn how your grinder behaves.
Do not use the finest possible setting as your starting point. The burrs may touch, the crank may become difficult to turn, and the grinder may produce more dust instead of a clean grind.
3. Turn the adjustment control one click
Make one small change at a time. On a click-based grinder, one click may produce a noticeable difference. On some Hario models, you may need two or more clicks before the change is clear.
If the control has no click marks, turn it by a small amount and record the position. A piece of removable tape can help you mark the starting point.
4. Grind a small dose
Use the same amount of coffee you normally brew. For a test, 15 to 20 grams is enough for many pour-over brews.
Keep the grinding speed steady. Do not race through the dose, since fast cranking can create more heat and make the handle harder to control.
5. Brew with the same method each time
Keep these factors as consistent as possible:
- Coffee dose
- Water amount
- Water temperature
- Pour pattern
- Filter
- Brewing device
- Brew time
Changing several things at once makes it hard to know whether the grind caused the improvement.
6. Taste the coffee
Taste the brew after it cools for a few minutes. Very hot coffee can hide sour, bitter, or dry notes.
Use taste and brew time together:
- If the coffee tastes sour, sharp, thin, or underdeveloped, try a finer setting.
- If the coffee tastes bitter, harsh, dry, or burnt, try a coarser setting.
- If the brew runs too quickly, use a finer setting.
- If the brew runs too slowly, use a coarser setting.
7. Record the setting
Write down the grinder setting, coffee dose, water amount, and result. A simple note such as “Mini Mill, 8 clicks, 20 g coffee, 300 g water, sour” can save time later.

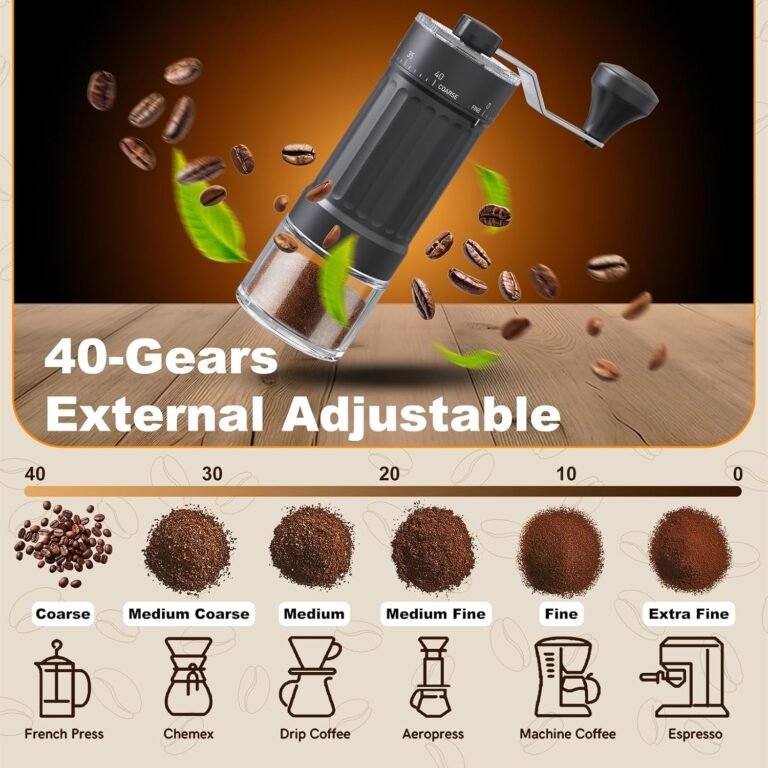
Suggested Hario Grind Settings by Brewing Method
Use these settings as starting points, not fixed instructions. Hario grinders differ, and the same model can produce different results as the burrs wear or the grinder is assembled differently.
| Brewing method | Starting grind size | What to look for |
|---|---|---|
| Turkish coffee | Very fine | Powder-like grounds; many Hario models may not grind fine enough |
| Espresso | Fine | Most basic Hario grinders may lack the consistency and adjustment range needed for espresso |
| AeroPress | Fine to medium-fine | Adjust based on brew time and pressure |
| Pour-over | Medium to medium-fine | Water should pass through at a steady rate without stalling |
| Automatic drip | Medium | The brew should not taste thin or muddy |
| Moka pot | Medium-fine | Avoid an extremely fine setting that can slow flow |
| French press | Coarse | Limit fine particles to reduce sludge and bitterness |
| Cold brew | Coarse | A coarse grind helps with filtering and reduces muddy coffee |
A practical pour-over starting point
For a typical U.S. pour-over setup, start around the middle of the grinder’s usable range. Brew 20 grams of coffee with about 300 grams of water. If the coffee tastes sour and the water drains quickly, move one or two clicks finer. If it tastes bitter or drains very slowly, move one or two clicks coarser.
This is a starting example, not a universal recipe. Light-roasted coffee may need a finer grind than dark-roasted coffee. A large paper filter may also drain faster than a small one.
A practical French press starting point
Use a coarse setting and brew with your normal steep time. If the cup feels muddy or bitter, move coarser and check for excess fines. If it tastes weak and watery, move slightly finer or extend the steep time before making a large grind change.

How to Adjust a Hario Grinder for Pour-Over Coffee
For pour-over coffee, make small changes and watch both the taste and drawdown time. Grind size affects how quickly water passes through the coffee bed.
Follow this process:
- Choose a coffee-to-water ratio and keep it steady.
- Begin at a medium setting.
- Brew one cup.
- Check how long the water takes to drain.
- Taste the coffee.
- Move one click finer or coarser.
- Brew again using the same method.
A fast drawdown with sour or thin coffee often means the grind is too coarse. A slow drawdown with bitter or dry coffee often means the grind is too fine.
Do not chase a specific brew time by itself. A fast brew can still taste good, and a slow brew can taste balanced. Time helps explain the result, but taste remains the final guide.
How to Adjust a Hario Grinder for French Press
French press coffee usually works best with a coarse grind. The larger particles are easier to separate from the drink and can reduce the amount of sediment in the cup.
If your French press coffee tastes muddy:
- Use a slightly coarser setting.
- Grind more slowly and evenly.
- Pour the coffee carefully after steeping.
- Check whether the filter screen is clean and properly fitted.
If the coffee tastes sour or weak:
- Move one or two clicks finer.
- Confirm that the water is hot enough for your normal recipe.
- Make sure the coffee steeps for the intended time.
- Check whether the beans are stale.
A Hario hand grinder may create more fine particles than a larger electric grinder. Some sediment is normal with French press brewing, even after a careful adjustment.
How to Adjust a Hario Grinder for AeroPress
AeroPress coffee can use a wide range of grind sizes. The best setting depends on the recipe, steep time, water amount, and whether you use standard or inverted brewing.
For a short brew with a fast press, try a finer grind. For a longer steep, try a medium or medium-coarse grind.
Use the coffee’s taste to guide the next adjustment:
- Sour and thin: Grind finer or steep longer.
- Bitter and dry: Grind coarser or steep for less time.
- Weak but not sour: Increase the coffee dose or reduce the water.
- Strong but harsh: Use more water or grind slightly coarser.
Change one factor at a time whenever possible. Grind size is only one part of an AeroPress recipe.

What to Do When the Grind Setting Does Not Change
If turning the dial seems to have no effect, check the grinder before changing the setting again.
The dial turns but the grounds look the same
Possible causes include:
- The burr adjustment nut is loose.
- The internal spring or washer is missing.
- The burr is not seated correctly.
- The grinder has not been cleaned.
- The change is too small to see by eye.
- The grinder is producing many fines that hide the change.
Remove the coffee, clean around the burrs, and check the parts against the model’s manual. Reassemble the grinder carefully and test several clicks apart rather than comparing adjacent settings.
The crank becomes hard to turn
Stop grinding if the handle suddenly becomes difficult to turn. The grinder may be set too fine, overloaded, or blocked by a hard object.
Remove the beans and check the burrs. Never force the handle. A stuck stone or other hard object can damage the burrs.
The grind is uneven
Uneven grounds may result from:
- A loose handle
- A worn or damaged burr
- A loose burr shaft
- Incorrect assembly
- Aggressive cranking
- A grinder design with limited burr stability
Clean and reassemble the grinder first. If the burrs remain loose or damaged, replacement parts or a new grinder may be more practical than repeated adjustment.

How to Keep a Hario Grinder Consistent
Clean the grinder often enough to prevent old coffee oils and grounds from affecting the adjustment. The right cleaning method depends on the model, so check the Hario instructions before washing parts.
Good maintenance habits include:
- Brush loose grounds from the burrs.
- Empty the grinder after use.
- Keep the ceramic burrs dry.
- Do not soak parts unless the manual says they are washable.
- Avoid using rice as a cleaning substitute.
- Check the burr assembly when the grind becomes inconsistent.
- Store the grinder in a dry place.
Do not wash the main grinder body or internal parts unless Hario states that they are safe to wash. Water can remain inside the mechanism and cause rust, odor, or poor movement.
A small amount of retention is normal, especially with hand grinders. If old grounds remain in the burr chamber, the first grind after a setting change may contain a mix of old and new sizes.

Common Hario Grinder Adjustment Mistakes
Using another grinder’s click chart
Online click charts can be useful for a rough starting point, but they are not universal. The model, burr design, assembly, bean type, and brewing device all affect the result.
Use a chart only as a guide. Taste and brew behavior should decide the final setting.
Changing too many clicks at once
A large adjustment can move past the useful range. Make smaller changes so you can learn what each click does.
Adjusting only by color or touch
Grounds can look similar even when they brew differently. Texture is also hard to judge without experience. Use brew speed and taste along with visual checks.
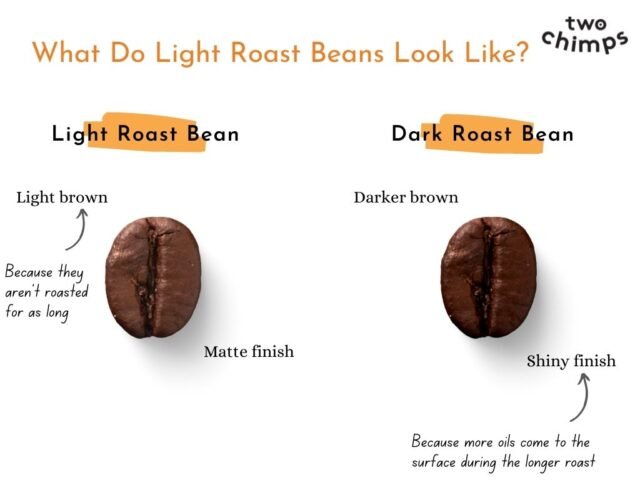
Ignoring the coffee roast
Dark-roasted beans are often more soluble and may taste bitter when ground too fine. Light-roasted beans may need a finer setting or longer extraction to taste balanced.
This is not a strict rule. Bean origin, processing, freshness, and roast profile also matter.
Grinding at the finest setting
The finest setting is not always the best setting. If the burrs touch, the grinder can become difficult to turn and may suffer damage. Espresso also requires more than a fine grind; it requires consistency, repeatability, and suitable adjustment control.
Failing to record changes
Without notes, it is easy to repeat the same mistake. Record the setting and recipe each time you make a meaningful change.

Quick Hario Grinder Adjustment Chart
Use this chart to choose the next move after tasting your coffee.
| Problem | First adjustment to try |
|---|---|
| Sour, sharp, or thin coffee | Grind finer |
| Bitter, harsh, or dry coffee | Grind coarser |
| Water drains too fast | Grind finer |
| Water drains too slowly | Grind coarser |
| Muddy French press coffee | Grind coarser and check for fines |
| Weak coffee with normal flow | Use more coffee or less water |
| Strong coffee with normal flow | Use less coffee or more water |
| Inconsistent grind | Clean and check burr assembly |
| Crank is hard to turn | Stop, empty, inspect, and move coarser if needed |
This chart assumes the water, recipe, and coffee dose are otherwise reasonable. If the coffee is stale or the filter is blocked, changing the grinder may not solve the problem.

Frequently Asked Questions
Which way do I turn a Hario grinder to make the grind finer?
On many Hario grinders, turning the adjustment control clockwise makes the grind finer. However, the direction can vary by model and control design. Follow the arrows or markings on your grinder. If there are no markings, confirm the change with a small test rather than relying on direction alone.
How many clicks should I use on a Hario grinder?
There is no single correct number for every Hario grinder. Start near the middle of the usable range, then adjust one click at a time. Record the setting that works for each brewing method and coffee.
Can a Hario grinder grind fine enough for espresso?
Some Hario grinders can produce a fine grind, but basic models may not provide the consistency, burr stability, or small adjustments needed for reliable espresso. If the grinder produces uneven grounds or the handle becomes difficult to turn, do not force it to an espresso setting.
Why does my Hario grinder produce uneven grounds?
Uneven grounds can come from the grinder’s burr design, a loose shaft, incorrect assembly, trapped grounds, worn burrs, or fast cranking. Clean the grinder and check the burr parts first. If the burr remains loose or damaged, adjustment alone may not correct the problem.
Should I adjust my Hario grinder with beans inside?
For a major adjustment, empty the grinder first. Some models allow small changes while the burrs are turning, but never force the dial against beans. Check the instructions for your exact Hario model.
Key Takeaways
- Start with the setting near the middle of the grinder’s range.
- Make one small adjustment at a time.
- Use a finer grind for sour, fast, or weak extraction.
- Use a coarser grind for bitter, slow, or dry extraction.
- Do not assume the same number works across Hario models.
- Clean and check the burr assembly when the setting seems ineffective.
- Stop if the crank becomes difficult to turn.
- Record the setting that works with each coffee and brewing method.
Conclusion
Adjusting a Hario coffee grinder is a simple cycle: set, grind, brew, taste, and change one click. Start with a moderate setting, keep your recipe steady, and let the coffee guide you.
If the cup tastes sour or brews too quickly, move finer. If it tastes bitter or brews too slowly, move coarser. When adjustments stop making a clear difference, clean the burrs and check the grinder’s assembly before changing the recipe.
One Comment