
Introduction
For most percolators used in U.S. homes, start with 1 level tablespoon of coarsely ground coffee for each percolator cup of water. A percolator cup is usually 5 to 6 U.S. fluid ounces, not the 8-ounce cup used on many kitchen measuring cups.
That means a 12-cup percolator may hold only 60 to 72 fluid ounces of water. It usually needs about 12 tablespoons of ground coffee for a balanced brew. You can use less for mild coffee or up to 2 tablespoons per cup for a strong pot.

Quick Answer: How Much Coffee Does a Percolator Need?
Use this simple rule:
1 level tablespoon of coarse-ground coffee per percolator cup of water
Use these amounts as a starting point:
| Percolator size | Water volume at 5 fl oz per cup | Coffee |
|---|---|---|
| 4-cup | 20 fl oz | 4 tablespoons |
| 6-cup | 30 fl oz | 6 tablespoons |
| 8-cup | 40 fl oz | 8 tablespoons |
| 10-cup | 50 fl oz | 10 tablespoons |
| 12-cup | 60 fl oz | 12 tablespoons |
| 20-cup | 100 fl oz | 20 tablespoons |
Many modern percolators use a 6-ounce cup instead of a 5-ounce cup. Check the water marks on your pot before measuring.
For a stronger brew, use 1½ tablespoons per cup. For a lighter brew, begin with 2 teaspoons per cup. Change the amount in small steps so you do not make the coffee bitter.

What Does “One Cup” Mean in a Percolator?
A percolator cup is a serving measurement, not a standard U.S. measuring cup. In many American coffee makers, one cup equals about 5 or 6 fluid ounces.
A standard U.S. measuring cup holds 8 fluid ounces. This difference causes many coffee mistakes. A “12-cup” percolator may not make twelve full 8-ounce mugs.
Percolator cups versus regular mugs
| Measurement | Approximate volume |
|---|---|
| Percolator cup | 5–6 fl oz |
| U.S. measuring cup | 8 fl oz |
| Small coffee mug | 8–10 fl oz |
| Large travel mug | 12–20 fl oz |
If your percolator makes 12 cups at 5 ounces each, it makes about 60 fluid ounces. That equals about seven and a half 8-ounce cups.
The safest method is to use the markings inside the pot. If the markings are unclear, measure the water with a U.S. liquid measuring cup and use the formula below.

How to Calculate Coffee for Any Percolator
Use this three-step method:
- Find the water level you want.
- Count the percolator cups or measure the water.
- Add the matching amount of ground coffee.
Method 1: Use the percolator cup markings
If you fill the pot to the 8-cup line, use:
- 8 tablespoons for medium-strength coffee
- 10 to 12 tablespoons for strong coffee
- 5 to 6 tablespoons for mild coffee
This method works well because the pot’s markings already account for its cup size.
Method 2: Measure water in fluid ounces
If you know the water volume, divide it by 5 or 6.
For example:
- 40 fl oz ÷ 5 = 8 percolator cups
- 40 fl oz ÷ 6 = about 6⅔ percolator cups
Then use about one tablespoon of coffee for each cup.
For a 40-ounce pot, start with 7 to 8 tablespoons of coffee. The exact amount depends on the pot’s markings and your taste.
Method 3: Measure coffee by weight
A kitchen scale gives more control. A useful starting point is about 55 to 60 grams of coffee per liter of water. This is close to the common coffee-brewing range used for many full-pot methods.
For a typical 12-cup percolator holding about 60 fl oz, use roughly:
- 100 to 110 grams for a balanced pot
- Less for a mild pot
- More for a stronger pot
Tablespoons are easier for daily use, but weight is more consistent because spoon size and coffee density vary.

Coffee Amounts for Mild, Medium, and Strong Coffee
Your preferred strength changes the amount of coffee more than the percolator itself.
| Desired strength | Coffee per percolator cup | 8-cup pot | 12-cup pot |
|---|---|---|---|
| Mild | 2 teaspoons | 5⅓ tbsp | 8 tbsp |
| Medium | 1 tablespoon | 8 tbsp | 12 tbsp |
| Strong | 1½ tablespoons | 12 tbsp | 18 tbsp |
| Very strong | 2 tablespoons | 16 tbsp | 24 tbsp |
These amounts are starting points. A dark roast may taste stronger than a light roast even when you use the same amount.
Do not confuse a darker roast with coffee that has more caffeine. Dark roasting changes flavor and weight, but the caffeine difference is not as simple as “dark means more.” Choose the roast for taste, then adjust the amount.
The Best Coffee Grind for a Percolator
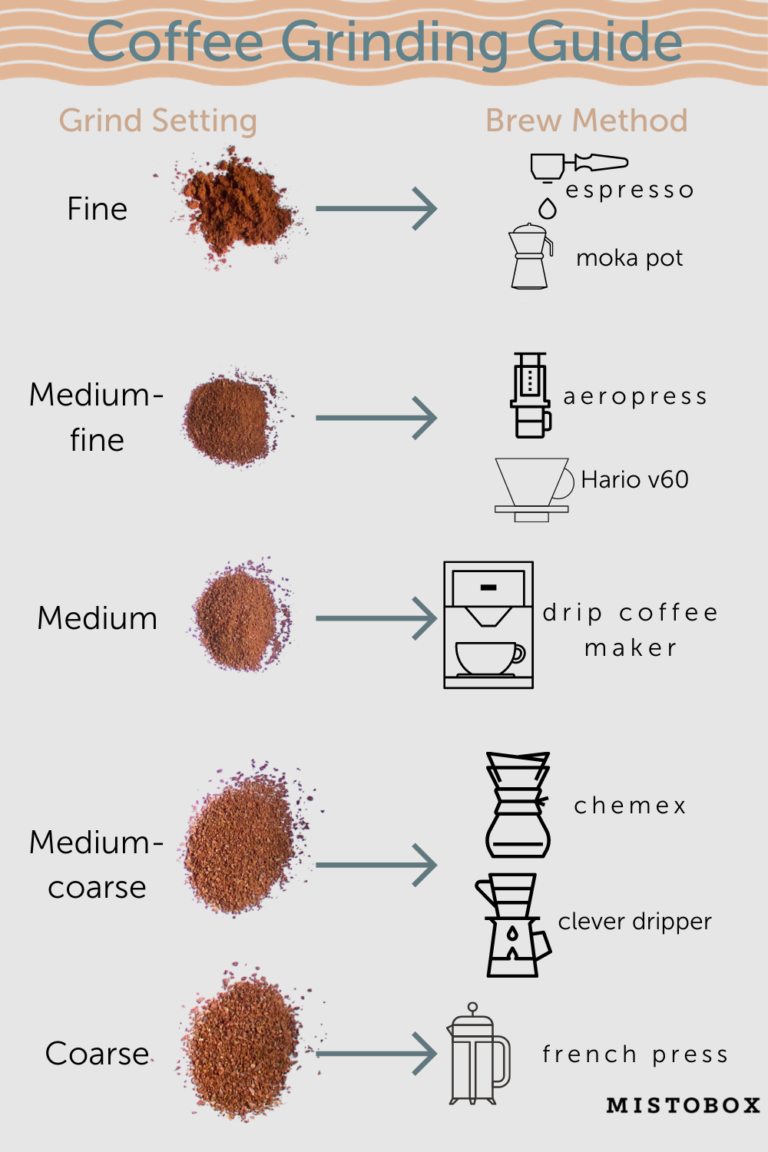
Use coarse-ground coffee in a percolator. The grounds should look similar to rough sea salt.
A coarse grind helps keep small particles from passing through the filter basket. It also lowers the risk of cloudy coffee and heavy sediment.
Avoid these grinds:
- Fine grind: May pass through the basket and create bitter coffee.
- Espresso grind: Usually too fine for a percolator.
- Very powdery pre-ground coffee: Can clog the basket or over-extract.
- Very large chunks: May produce weak coffee.
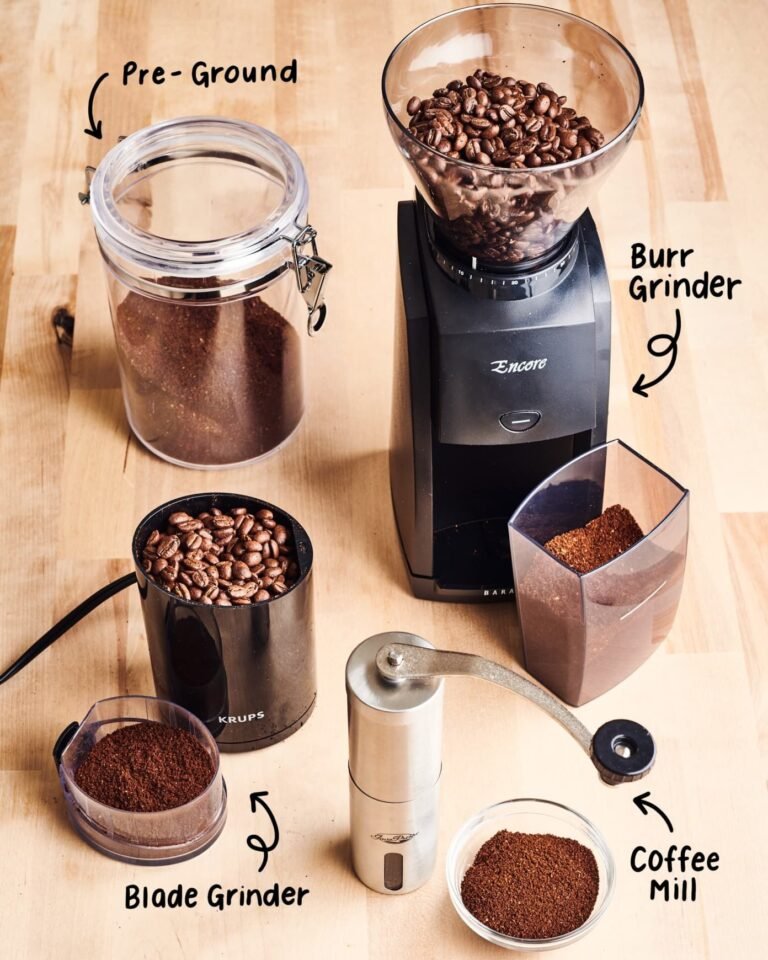
If you grind beans at home, use a coarse setting. If you buy ground coffee, look for a grind labeled coarse or percolator grind.
How to Make Coffee in a Percolator
Follow these steps for a stovetop or electric percolator.
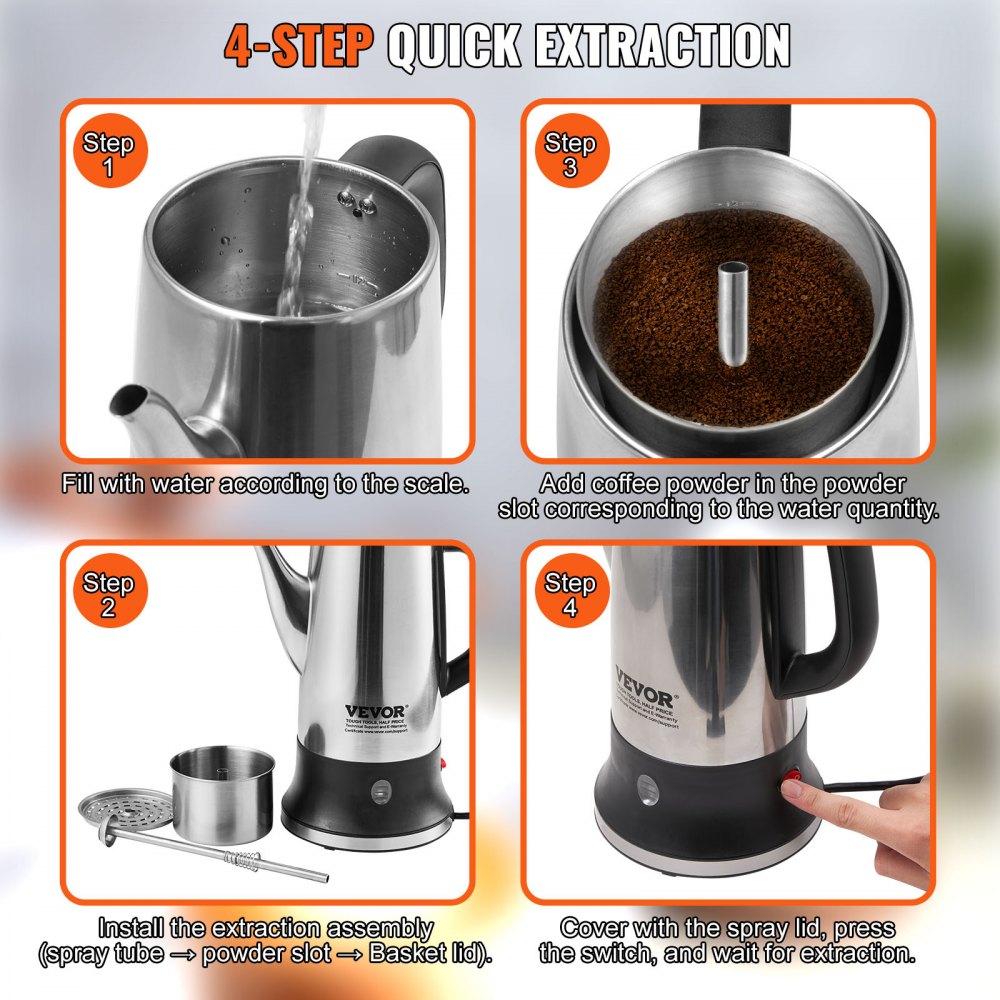
1. Add the water
Pour fresh, cold water into the lower chamber. Use the level markings when available.
Do not fill above the maximum line. Extra water can spill into the stem or basket and may weaken the coffee.
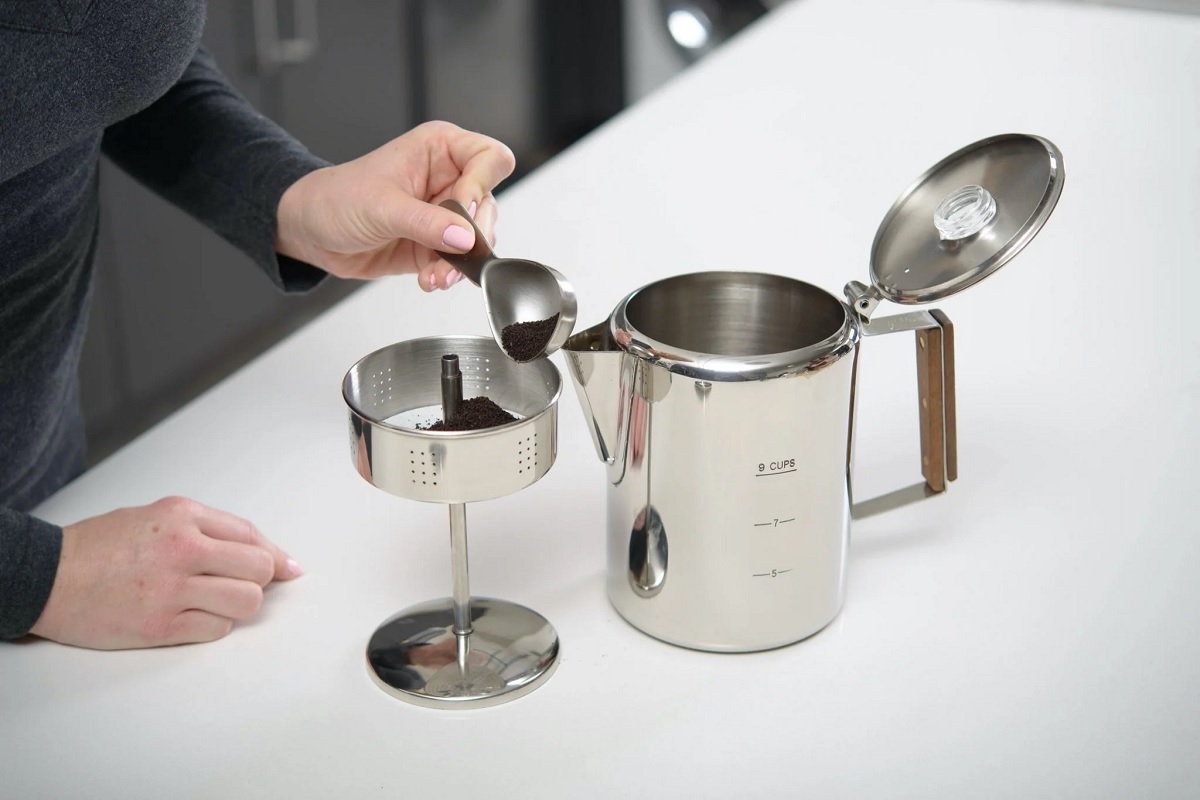
2. Add the coffee
Place coarse coffee in the filter basket. Use about 1 tablespoon per percolator cup.
Level the coffee. Do not pack it down. Packed grounds can slow water flow and cause uneven brewing.
3. Assemble the stem and basket
Set the stem into the pot. Place the basket on the stem and fit the lid securely.
Make sure the stem sits correctly. If it is loose or off-center, water may not rise through the coffee as it should.
4. Heat the pot
For a stovetop percolator, heat the pot until the water begins to perk. Then lower the heat.
For an electric percolator, plug it in and use the normal brew cycle. Many electric models shut off or switch to a keep-warm mode after brewing.
5. Watch the brewing time
Once the coffee starts to perk, allow it to brew for about 7 to 10 minutes as a starting point. Smaller pots may need less time.
Stovetop heat varies, so watch the brew rather than relying only on the clock. A gentle, steady perk is better than a hard boil.
6. Remove the coffee basket
When brewing ends, remove the basket if the design allows it. This keeps the grounds from continuing to steep.
Use care because the basket, stem, and coffee may be very hot.
Signs of a good brew
A good percolator coffee usually has:
- A clear, rich color
- A strong but pleasant aroma
- Little loose sediment
- No burnt smell
- A balanced taste without sharp bitterness

How Much Coffee for a 30-Cup Percolator?
A 30-cup percolator commonly needs about 30 tablespoons of coffee when using the one-tablespoon-per-cup rule.
That equals:
- 1¾ cups of coffee grounds, using 16 tablespoons per cup
- About 240 to 270 grams, depending on grind and coffee density
For a large gathering, start with 1 tablespoon per cup. You can make a second batch stronger if needed, but you cannot easily fix a pot that is too bitter.
Some large commercial-style percolators use cup markings that differ from home models. Always check the pot’s capacity and instructions before preparing coffee for a crowd.

How Much Coffee for a Stovetop Percolator?
A stovetop percolator uses the same basic ratio: about 1 tablespoon of coarse coffee per cup of water.
The main difference is heat control. A stovetop pot can overheat quickly, which may make the coffee taste burnt or harsh.
For stovetop brewing:
- Begin with medium heat.
- Lower the heat once the coffee starts to perk.
- Keep the perk gentle.
- Remove the pot from heat when the coffee reaches the desired strength.
- Let it rest briefly before serving.
If the coffee tastes burnt, reduce the heat or shorten the brewing time. Adding more water after brewing may reduce the strength, but it will not remove a burnt flavor.

How Much Coffee for an Electric Percolator?
For an electric percolator, use the same starting ratio of 1 tablespoon per percolator cup.
Electric models often control heat and brewing time on their own. This makes them easier to use, but the final taste still depends on the grind, coffee amount, and water level.
Before brewing, check the manual for:
- The exact cup size
- The maximum fill line
- The recommended coffee amount
- Whether the basket needs a paper filter
- The keep-warm function
- Cleaning instructions
Do not use a paper filter unless the manufacturer allows it. Some baskets are designed to work without one, while others may support a filter to reduce sediment.

Why Does Percolator Coffee Taste Bitter?
Bitter coffee usually comes from too much extraction. This happens when hot water passes through the grounds for too long or too often.
Common causes include:
-
Too much coffee
Reduce the amount by 1 or 2 tablespoons per full pot. -
Coffee ground too finely
Switch to a coarse grind. -
Brewing for too long
Shorten the brewing time. -
Water boiling too hard
Lower stovetop heat after the first perk. -
Old coffee or stale grounds
Use fresh coffee stored in an airtight container. -
Mineral buildup
Clean the pot, stem, and basket. Mineral deposits can affect water flow and flavor.
A bitter taste may also come from burnt coffee sitting on a hot burner or keep-warm plate. Serve the coffee soon after brewing when possible.

Why Is Percolator Coffee Weak?
Weak coffee often means the pot has too much water, too little coffee, or too short a brew time.
Try these changes:
- Add 1 tablespoon of coffee to the next batch.
- Use a coarse but not extra-large grind.
- Confirm that the stem is installed correctly.
- Check that the basket holes are not blocked.
- Make sure the water reaches the intended level.
- Brew for the full time stated in the manual.
Do not solve weak coffee by using a very fine grind. Fine grounds can make the coffee muddy and bitter without creating a better flavor.
Common Percolator Mistakes to Avoid
The most common mistake is treating a percolator cup as an 8-ounce cup. This can lead to too much coffee or too little water.
Avoid these errors:
- Filling the coffee basket above its safe capacity
- Pressing or tamping the grounds
- Using a fine espresso grind
- Letting the pot boil hard
- Leaving brewed coffee on heat for a long time
- Filling the pot beyond its maximum line
- Using a damaged cord or cracked pot
- Cleaning only the outside and ignoring the stem
- Assuming every “12-cup” pot holds the same volume
Hot coffee and steam can cause burns. Use the handle and lid knob, keep the cord away from heat, and allow the pot to cool before cleaning. For an electric model, unplug it before washing or removing parts.
How to Adjust the Recipe for Your Coffee
The best ratio depends on more than the number printed on the pot.
Coffee roast
Light roasts can taste bright and sharp. Dark roasts can taste bold and smoky. If dark roast tastes too strong, reduce the coffee slightly rather than brewing it for less time.
Coffee freshness
Freshly ground coffee often has more aroma. Store whole beans or grounds in a cool, dry, airtight container. Avoid storing coffee in the refrigerator, where moisture and odors can affect it.
Water quality
Use clean, fresh water. If tap water has a strong taste or heavy mineral content, filtered water may produce a cleaner cup.
Batch size
A partly filled percolator may not brew in the same way as a full pot. Some models need a minimum water level to work correctly. Follow the manual when making a small batch.
Personal taste
Change one factor at a time. For example, keep the brew time the same and add one tablespoon of coffee. This helps you learn what improves the flavor.

Frequently Asked Questions
Is one tablespoon of coffee enough for one percolator cup?
Yes. One level tablespoon of coarse-ground coffee per percolator cup is a useful starting point. Use 2 teaspoons for a lighter cup or 1½ tablespoons for a stronger cup.
How many tablespoons of coffee go in a 12-cup percolator?
Start with 12 tablespoons for medium-strength coffee. Use about 8 tablespoons for mild coffee and 18 tablespoons for strong coffee. Check whether the pot defines each cup as 5 or 6 fluid ounces.
Can I use regular ground coffee in a percolator?
You can, but regular coffee may be too fine. Coarse-ground coffee works better because it reduces sediment and lowers the chance of bitter extraction.
Do I need a paper filter in a percolator?
Usually, no. Many percolators have a built-in metal basket. Use a paper filter only if the manufacturer says it is compatible with your model.
How long should coffee perk?
A common starting range is 7 to 10 minutes after perking begins. The exact time depends on the pot size, heat, coffee amount, and model instructions.
Can I make less than a full pot?
Often, yes, but do not go below the minimum fill line. Some percolators need enough water to move through the stem correctly. Follow the instructions for your model.
Conclusion
For most U.S. percolators, use 1 level tablespoon of coarse-ground coffee per percolator cup of water. Since one percolator cup is often 5 to 6 fluid ounces, a 12-cup pot usually needs about 12 tablespoons of coffee, not 12 standard 8-ounce cups.
Start with that ratio, then adjust by one or two tablespoons. Use less for mild coffee, more for strong coffee, and choose a coarse grind to reduce bitterness and sediment. Always follow the water marks and safety instructions for your specific percolator.
The best next step is simple: fill the pot to its normal level, add one tablespoon per marked cup, and adjust the next batch based on taste.
One Comment