
Dialing in a coffee grinder means adjusting the grind size until your coffee tastes balanced and brews within a useful time. Start with a fixed recipe, change only the grind size, and make small changes after each test.
For most home brewers in the United States, the best method is simple: use fresh coffee, weigh the dose, keep the water and brew method steady, then adjust the grinder based on taste and flow. If the coffee tastes sour and runs too fast, grind finer. If it tastes bitter and runs too slowly, grind coarser.
What Does “Dialing In” a Coffee Grinder Mean?
Dialing in is the process of matching a grinder setting to a coffee bean, brew method, dose, and recipe. The goal is not to find one “correct” number on the grinder. Grinder settings are not standardized, so setting 10 on one model may be much finer or coarser than setting 10 on another.
Coffee changes as it ages. A new bag may need a different setting from the same coffee a week later. The roast level, bean density, moisture, dose, water, and brewing device also affect the result.
A good dial-in process controls as many variables as possible:
- Coffee dose
- Water weight
- Water temperature
- Brew ratio
- Grind size
- Brew time
- Brewing method
- Filter type
- Distribution and tamping, for espresso
The grind size is usually the easiest variable to change. That is why it should be your main adjustment during the first few tests.
The key terms
- Dose: The amount of dry coffee used, measured by weight.
- Yield: The amount of brewed coffee or espresso produced, measured by weight.
- Brew ratio: The relationship between coffee dose and water or espresso yield.
- Extraction: The process of dissolving flavor compounds from ground coffee.
- Flow rate: How quickly water moves through the coffee bed.
- Retention: Ground coffee that stays inside the grinder instead of coming out immediately.
- Burrs: The cutting surfaces that grind coffee. Burr grinders usually provide more control than blade grinders.
A balanced cup often has sweetness, clear flavor, enough body, and a pleasant finish. “Balanced” does not mean mild. A dark roast can taste bold and balanced, while a light roast can taste bright and balanced.
What You Need Before You Start
You need a burr grinder, a scale, fresh coffee, and a repeatable brewing method. A timer helps, and an instant-read thermometer can help if your brewer does not control water temperature.
Use the following setup:
- A burr grinder: A manual or electric burr grinder is suitable. A blade grinder makes it harder to repeat a setting because it chops coffee unevenly.
- A digital scale: Choose one that measures at least to 0.1 grams for espresso or 1 gram for many drip brewers.
- Fresh coffee: Use beans with a visible roast date when possible. Very old coffee may produce weak, flat results even with a good grind.
- A stable recipe: Record the dose, water amount, temperature, grind setting, and brew time.
- Clean equipment: Old oils and trapped grounds can add stale or rancid flavors.
Before you begin, read the grinder manual. Some grinders should be adjusted while the motor runs, especially when moving toward a finer setting. Do not force the adjustment ring if coffee is packed between the burrs.
Choose a starting recipe
Use a simple starting point rather than changing several variables at once.
| Brew method | Starting coffee dose | Starting ratio or yield | General grind range |
|---|---|---|---|
| Pour-over | 20 g | 300–320 g water | Medium-fine to medium |
| Automatic drip | 30 g | 500 g water | Medium |
| French press | 30 g | 500 g water | Coarse |
| AeroPress | 15–18 g | 220–250 g water | Fine to medium |
| Espresso | 18 g | 36 g espresso | Fine |
These are starting points, not rules. A coffee may taste better with a different ratio or grind. The purpose of a starting recipe is to give you a stable baseline.
If you are brewing espresso, begin with a ratio near 1:2. For example, use 18 grams of coffee and aim for about 36 grams of espresso. Many espresso recipes fall somewhere between about 1:1.5 and 1:2.5, depending on the coffee and desired flavor.
How to Dial In a Coffee Grinder Step by Step
The most reliable process is to change one thing at a time. Start at a reasonable setting, brew a sample, taste it, and adjust the grind in the direction suggested by the result.
1. Set your dose and recipe
Weigh the coffee before grinding. For example, use 20 grams of coffee for a pour-over or 18 grams for espresso.
Keep the dose fixed while dialing in. If you change the dose and grind size at the same time, you will not know which change affected the result.
Write down:
- Coffee name and roast date
- Dose
- Water amount
- Water temperature
- Grinder setting
- Brew time
- Final yield
- Taste
A note on your phone is enough. A simple record prevents you from repeating failed settings.
2. Grind a small test dose
Grind only the amount needed for one brew. This reduces waste and makes the test easier to compare.
Purge a small amount of coffee if the grinder has significant retention or if you recently changed from a very different setting. The exact amount depends on the grinder. A few grams may be enough for one model, while another may need more.
Avoid judging the grounds by appearance alone. Two grinders can produce grounds that look similar but extract differently. Taste and brew behavior matter more.
3. Brew without changing the other variables
Use the same water, filter, dose, and technique for the first test. For pour-over, keep your pouring pattern similar. For espresso, keep the puck preparation, basket, dose, and tamp consistent.
Measure the final brew when practical. For espresso, stop the shot by weight rather than relying only on the machine timer. For manual brewing, record the total brew time and final beverage weight if your method allows it.
4. Taste the coffee after it cools slightly
Very hot coffee can hide flavor problems. Taste it when it is warm enough to drink safely and again as it cools.
Ask four questions:
- Is the coffee sour, sharp, or salty?
- Is it bitter, dry, or harsh?
- Does it taste weak or thin?
- Does it taste sweet, clear, and balanced?
Do not judge only by brew time. Time can reveal a problem, but taste tells you whether the result is useful.
5. Adjust the grind size
Use this basic rule:
- Sour, sharp, thin, or underdeveloped: Grind finer.
- Bitter, dry, harsh, or heavy: Grind coarser.
- Weak but not sour: Consider a larger dose or less water, not only a finer grind.
- Strong but unpleasantly bitter: Consider a smaller dose or more water, not only a coarser grind.
Move the grinder in small steps. On a stepped grinder, change one or two clicks at a time. On a stepless grinder, make a small adjustment and mark the setting if needed.
For espresso, small changes can have a large effect. A slight adjustment may change the shot time and flavor considerably. For drip coffee and French press, larger changes are often easier to evaluate.
6. Brew again and compare
Use the same recipe for the second test. Compare the new cup with the first one.
If the coffee improves, continue in the same direction with a smaller adjustment. If it becomes worse, return toward the first setting and move in the opposite direction.
Stop adjusting when the coffee tastes balanced enough for you. Perfect uniformity is not required. The goal is a repeatable cup you enjoy.
How to Dial In Espresso
Espresso needs closer control because water passes through a compact coffee puck under pressure. Small changes in grind size can strongly affect flow.
Start with a fixed dose that fits your basket. An 18-gram basket should not automatically receive 20 grams. Follow the basket maker’s stated range when available.
Use this starting example:
- Dose: 18 grams
- Yield: 36 grams
- Ratio: 1:2
- Brew temperature: Use the machine’s normal setting
- Target time: About 25–35 seconds as a starting range
The time range is only a guide. A delicious espresso may run outside it, while a shot inside the range may taste poor.
If espresso runs too fast
If 18 grams of coffee produces 36 grams of espresso in a very short time and tastes sour or thin, the puck may offer too little resistance.
Try these checks:
- Grind slightly finer.
- Confirm that the basket received the correct dose.
- Distribute the grounds evenly.
- Tamp level and with consistent pressure.
- Check for channeling, where water forms fast paths through the puck.
Channeling can cause a shot to run quickly while also tasting bitter and sour. The water may overextract some areas and underextract others.
If espresso runs too slowly
If the shot barely flows, produces a harsh taste, or takes much longer than your starting target, try grinding slightly coarser.
Also check for:
- An overfilled basket
- A grind that is too fine
- Clumped grounds
- An uneven tamp
- A blocked shower screen or basket
- Coffee residue from an earlier setting
Do not keep grinding finer when the machine is already choking. That can make the problem worse.
Adjust espresso yield when taste calls for it
Grind size is not the only useful adjustment. If the shot tastes intense and dry, a longer yield may help. If it tastes thin and sharp, a shorter yield may preserve more body.
For example:
- 18 g in and 36 g out is a 1:2 ratio.
- 18 g in and 45 g out is a 1:2.5 ratio.
- 18 g in and 27 g out is a 1:1.5 ratio.
Change one variable at a time when possible. Start with grind size, then consider yield or temperature if the coffee remains unbalanced.
How to Dial In Pour-Over and Drip Coffee
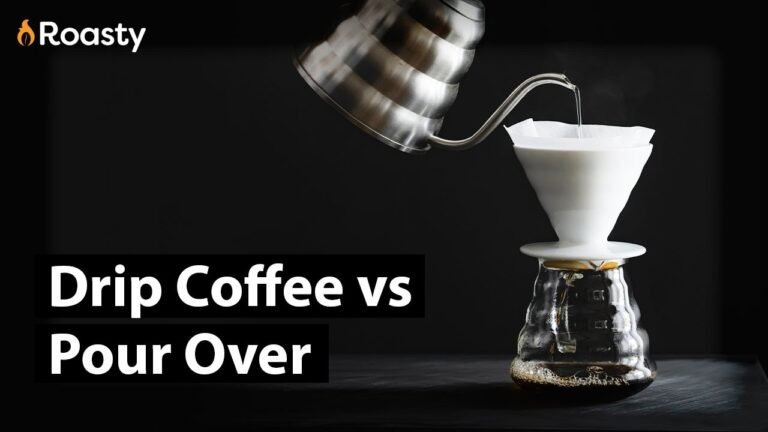
For pour-over coffee, grind size affects both flow and extraction. A finer grind usually slows the water and increases extraction. A coarser grind usually speeds the water and can reduce extraction.
A useful starting recipe is 20 grams of coffee to 300 grams of water. Use a medium-fine to medium grind and keep the pouring method consistent.
When pour-over tastes sour
Sourness often means the coffee needs more extraction. Try:
- Grinding finer
- Using slightly hotter water
- Pouring more slowly
- Increasing the brew time
- Using a little more water, if the coffee tastes concentrated
Make only one change first. Grinding finer is usually the clearest first test.
When pour-over tastes bitter or dry
Bitterness and dryness can indicate too much extraction or uneven extraction. Try:
- Grinding coarser
- Pouring more gently
- Reducing the brew time
- Using slightly cooler water
- Checking that the filter is not clogged
A very fine grind can create a slow drawdown and muddy coffee bed. A clogged paper filter can cause a similar symptom.
When the brew time looks wrong
Brew time varies with grinder design, filter shape, coffee freshness, roast level, and pouring technique. Do not use time as a universal pass-or-fail test.
Use time as a clue:
- Fast flow plus sour flavor often suggests a finer grind.
- Slow flow plus bitter or dry flavor often suggests a coarser grind.
- Slow flow plus sour flavor may indicate channeling, uneven pouring, or a clogged filter rather than simply a grind problem.
Automatic drip machines can also behave differently from manual brewers. Follow the machine’s normal cycle and use taste as the final measure.
How to Dial In French Press and Immersion Coffee
Immersion methods are less sensitive to flow because the coffee steeps in water. Grind size still affects extraction, clarity, and the amount of fine sediment.
Start with a coarse grind and a ratio near 1 gram of coffee to 16–17 grams of water. For example, use 30 grams of coffee with 500 grams of water.
If the coffee tastes sour or weak, try:
- Grinding slightly finer
- Steeping longer
- Using hotter water
- Increasing the coffee dose
If the coffee tastes bitter, dry, or muddy, try:
- Grinding coarser
- Steeping for less time
- Pouring more gently
- Using a cleaner plunge
Very fine grounds can pass through the filter and create heavy sediment. They can also make the coffee taste harsh if the coffee remains in contact with water for too long.
A French press does not need espresso-fine coffee. If the grinder produces many tiny particles, the cup may become muddy even when the main grind looks coarse.
How Coffee Taste Helps You Choose a Grinder Adjustment
Taste is a better guide than a grind chart because grind numbers vary between grinders. The table below gives a practical starting diagnosis.
| What you notice | Likely issue | First adjustment |
|---|---|---|
| Sour, sharp, or lemon-like | Underextraction | Grind finer |
| Bitter, dry, or harsh | Overextraction | Grind coarser |
| Weak and watery | Low strength | Use more coffee or less water |
| Strong but bitter | Too much extraction or concentration | Grind coarser or use more water |
| Fast espresso flow | Low puck resistance | Grind finer |
| Slow espresso flow | High puck resistance | Grind coarser |
| Uneven flavor, both sour and bitter | Channeling or uneven brewing | Improve distribution and technique |
| Muddy French press | Too many fine particles | Grind coarser or use a cleaner plunge |
| Flat flavor despite a good recipe | Stale coffee or dirty equipment | Use fresher coffee and clean the grinder |
These symptoms overlap. For example, sour coffee does not always mean the grind is too coarse. Uneven extraction can produce sour and bitter flavors in the same cup.
Why Your Grinder Setting Changes Over Time
A grinder setting can change because the coffee changes, not because the grinder is faulty.
Fresh coffee releases carbon dioxide after roasting. As the beans rest and age, their brewing behavior can shift. You may need to adjust the grind to maintain the same flow and flavor.
Other causes include:
- A different roast level
- A different coffee origin or processing method
- Changes in room temperature or humidity
- A different dose
- A new filter
- Grinder burr wear
- Coffee buildup inside the grinder
- Static or retention
- A change in water temperature
- A change in brewing technique
Keep a small dial-in record for each bag. Record the final setting that worked, but do not assume the number will transfer perfectly to another coffee.
Common Dial-In Mistakes
Changing too many variables at once
Changing the grind, dose, water, and brew time together makes the result hard to interpret. Keep the recipe fixed and start with grind size.
Trusting the grinder’s number
Grinder settings are model-specific. Use the number as a reference for your own grinder, not as a universal grind measurement.
Adjusting based only on time
A target time can help, especially for espresso, but time does not guarantee good flavor. Taste the coffee before making the next change.
Using inconsistent doses
A difference of even a gram can affect strength and flow. Weigh the dose each time while learning.
Ignoring channeling
Uneven puck preparation can make a good grind look bad. For espresso, distribute grounds evenly and tamp level. For pour-over, use an even bed and avoid pouring only in one small area.
Forgetting grinder retention
Old grounds can mix with the new coffee and affect the first dose after an adjustment. Purge enough to clear the old setting, but avoid wasting large amounts without need.
Grinding too far without recording the setting
If the coffee gets worse, you need a known starting point. Record each change and move in small steps.
A Simple Dial-In Worksheet
Use this short log for each coffee:
| Test | Dose | Water or yield | Grind setting | Time | Taste | Next step |
|---|---|---|---|---|---|---|
| 1 | 20 g | 320 g | Starting point | — | Sour and thin | Grind finer |
| 2 | 20 g | 320 g | One step finer | — | Sweeter, still sharp | Grind slightly finer |
| 3 | 20 g | 320 g | Small adjustment | — | Balanced | Keep setting |
For espresso, replace the water column with beverage yield. For example, record 18 grams in, 36 grams out, the grinder setting, shot time, and taste.
Once you find a good setting, repeat it once. If the result is similar, the recipe is likely stable enough for daily use.
Frequently Asked Questions
How long does it take to dial in a coffee grinder?
It can take one to several brews. Espresso often needs more careful adjustment than drip coffee because small grind changes have a large effect. Fresh coffee, a repeatable recipe, and a scale make the process faster.
Should I adjust the grinder finer or coarser first?
Use the taste and flow as your guide. Go finer when coffee tastes sour, thin, or runs too quickly. Go coarser when coffee tastes bitter, dry, or runs too slowly.
Should I change the dose or the grind size?
Change the grind size first when the coffee strength is acceptable. Change the dose when the coffee tastes properly extracted but is too weak or too strong. Keeping these variables separate makes troubleshooting easier.
Can I dial in coffee without a scale?
Yes, but a scale makes the process much more repeatable. Without one, dose and yield can vary enough to hide the effect of a grind adjustment.
Why does the same grinder setting work differently for different coffee beans?
Beans vary in roast level, density, age, processing, and moisture. These differences change how easily the burrs break the beans and how the grounds extract. Each new coffee may need its own setting.
Final Takeaway
To dial in a coffee grinder, begin with a fixed recipe and a measured dose. Brew one test, taste it, and change the grind in small steps. Grind finer for sour or fast coffee, and grind coarser for bitter or slow coffee.
Keep notes, control your brewing technique, and judge the finished cup rather than the grinder number alone. Once the coffee tastes balanced and the process repeats well, you are dialed in.


One Comment